This page will provide information on the different parts of a model railway system, that together make up a model railway layout.
Layouts
Layout is a general term usually given to a set-up of a model railway system. A layout can be fixed, transportable or portable. When modules of a modular system are connected together, it is usually referred to as a modular layout. Fixed layouts would typically be built in a dedicated location (a room for example) where the track is laid on a surface that is specifically designed to the size and shape that the modeller wants.
Other elements like wiring and scenery are also part of these layouts, and some people create extraordinarily realistic scenes for their trains to run through.
Scenery
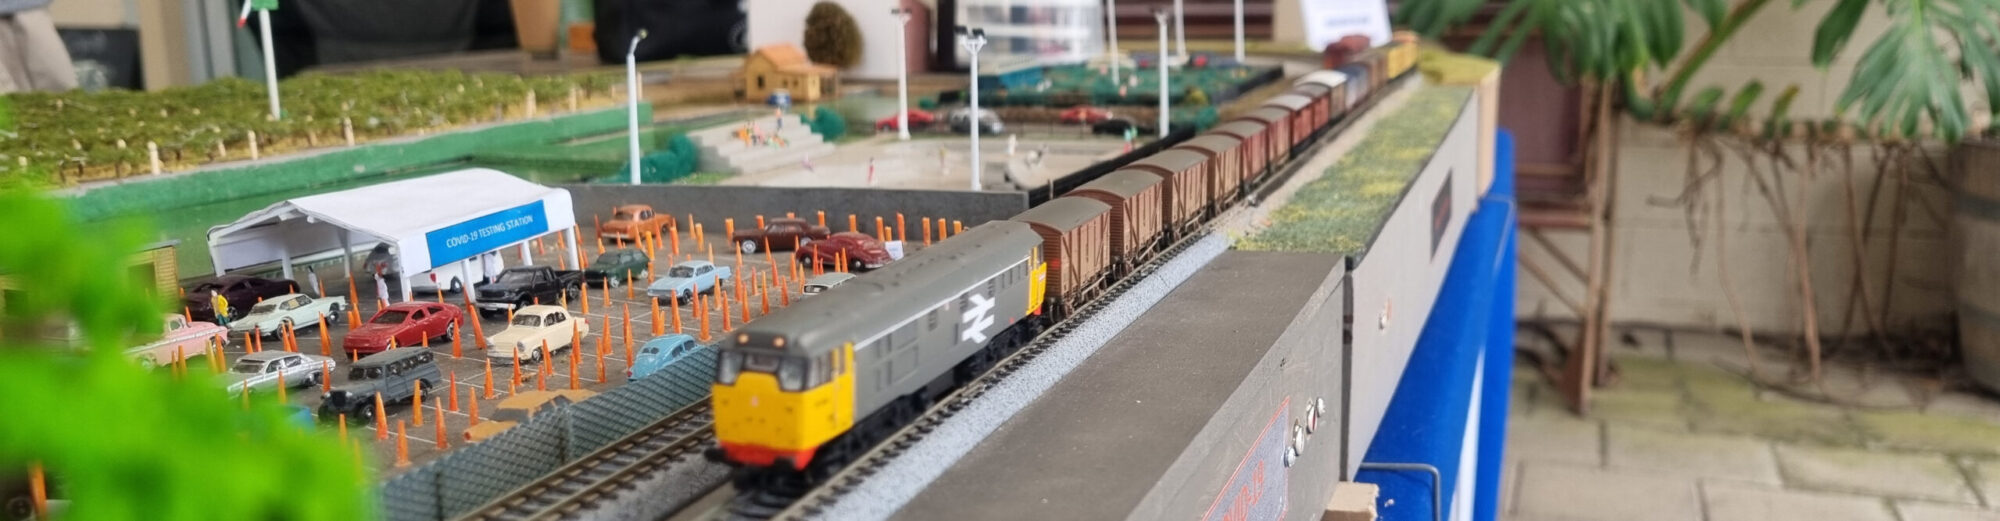
Part of the appeal of railway modelling is the creation of miniature worlds that our trains operate in. Scenes on small modules (eg a standard size T-TRAK module) are often referred to as a ‘diorama’.
Buildings, roads, rivers, hills and mountains, wide open farmland, forests, beaches – any aspect of the landscape that exists in real-life can be modelled on our modules or layouts. Of course, people and animals are also an important part of scenery, and the addition of people can really bring a scene “to life”.
Some scenery is actual models of the things we want to show, such as small buildings or trees, while at other times we want to convey these items as existing “off in the distance” so they might be painted onto boards that are placed at the back of a module or layout. Either way, these elements are designed to add interest and / or convey a sense of time and place to the module or layout.
Trains
Naturally we want to have trains running on our tracks.
These days there is a vast choice of motive power (locomotives and railcars/railmotors) to choose from.
Almost every real-life train system operating somewhere in the world can be found running on a model railway, and many of these would be available for purchase as readymade models. If you have the desire to operate trains from America, Britain, Canada, or Europe, off the shelf models are relatively easy to find. Some countries are harder to obtain off the shelf, and in these cases, people will find models that are sufficiently close to what they want, and modify them to suit, or even build a model from scratch. Unfortunately, for N scale modellers of Australian prototype, there is very little available as ready-to-run, but there are a reasonable number of kits available.
Ultimately the choice of what trains to operate is up to the individual, and there is a saying that is often used – “My railway, my choice!”
Power
Power is used primarily in two areas of our modules or layouts – to operate the the railway (i.e., trains, turnouts, signals, etc), or to light up or operate scenery.
Power for the trains
The power used to make our trains run is fed to the trains via the metal rails of the tracks. Metal wheels on the trains then pick up this power to be used to drive a small electric motor in the train, which then drives the wheels to move the train.
There are 2 primary means of operating our model trains – DC and DCC, which are explained below.
DC (Direct Current)
DC is the simpler of the 2 power systems. Just like a standard battery, the power has a positive side and a negative side, and each of these is connected to one side of the rails.
In order to control the speed of the train on the track, the DC voltage is adjustable via a control box or panel, which has a speed control knob mounted on it. Turning the knob to the lowest position stops the train, turning it to the maximum position makes the train go fast, and setting the knob in between the two extremes sets the speed of the train to what we want at the time.
To change the direction of the train on the track, the positive and negative connections to the track need to be swapped around. This is usually achieved by a switch mounted near the speed control knob, with 2 positions allowing for travel in both directions.
Because DC systems apply the same voltage to all pieces of track that are connected together, and the locomotives are simply acting on the amount of voltage on the rails, if more that 1 train is sitting on the track, they will all respond to the same speed control knob. However, individual trains might move at different speeds for any given speed setting, and so having more than 1 train on the same track controlled by DC controllers is not always possible.
DC systems use a relatively simple power controller to supply power to the tracks.
DCC (Digital Command Control)
DCC is a newer power system than DC and allows for much more advanced control of the trains.
With DCC, power is applied to the rails all the time. As well as the power, special coded messages are also applied to the rails to send information from a controller to a train.
Each train on a DCC system has an electronic circuit built into it, and that circuit is looking for the messages on the rails that correspond to the specific train. So as an example, the person driving the train might want his train to move forward at a medium speed. The controller then sends a coded message to the train that tells it to move forward at – let’s say – 50% speed. The train sees that message, and the electronic circuit then sends power to the motor to move the train at the desired speed.
Because the message is coded for the specific train, if there are other trains sitting on the same track, they will see the message, but they won’t act on it, because the message wasn’t sent to them. In this way, DCC allows us to have multiple trains on the same track and control them independently more easily than DC systems do.
DCC also allows for more complex operation of the trains, giving the operator control of lights on the train, or sounds, or even (in larger scales than N Scale) smoke generators for steam engines etc. DCC can also operate the auxiliary systems such turnout and signal control.
Besides using commercial system specific controllers, mobile phones can also be integrated to operate the DCC system.
DCC systems require a “DCC Command Station” that accepts inputs from the operators and sends the required data trains via the tracks together with the power. Although the command stations are more complex, and hence more expensive than simple DC systems, their flexibility is making them a very popular choice for new systems.
Scenery Power
The visual appeal of scenery can be enhanced by the addition of lights (e.g., lights inside buildings or streetlights), or the scenery can be made to move if appropriate. This requires power of some sort.
The actual power required for scenery items depends on the item itself, but 2 common power systems for scenery items are 16 Vac, or 12 Vdc.
DIY Systems
For those people who like DIY projects, building a layout and making the scenery is not all there is to this aspect of the hobby.
It is also possible to build a complete DCC control system, using readily available parts, and free software available from the Internet.
These systems are often based around 2 particular processing platforms – the Raspberry Pi, and / or the Arduino system.
DIY DCC Command Station
A complete DIY DCC Command Station can be built using an Arduino Mega micro-controller, and the open source DCC-EX project.
This project describes itself as:
DCC-EX is a team of dedicated enthusiasts producing open source DCC solutions for you to run your complete model railroad layout. Our easy to use, do-it-yourself, affordable products are based on off-the-shelf Arduino technology and are supported by numerous third party hardware and apps like JMRI, Engine Driver, wiThrottle, Rocrail and more.
From the DCC-EX home page at https://dcc-ex.com/
Putting a DCC-EX system together is very easy using by following the guides that the team produce, and a full DCC system can be built for less than $100.00, depending on what options you choose.
DIY Computer Control of a Layout
If you have an older PC that is no longer being used, it is very likely that it could be put to use to interface with your DCC controlled layout.
If you don’t have an old PC lying around, a Raspberry Pi is an inexpensive option that can cost less than $100.00 and can be used in place of an older (or newer) PC.
Using the freely available JMRI software package, a recent version of Java, and an appropriate interface for your DCC Command Station (often a USB connection), the PC can be setup with information about:
- the locomotives that are used on the layout, allowing the user to drive the trains from the PC
- a diagram of the layout and any turnouts in use
- connections to different power sections of the tracks, allowing for the system to know when a train is sitting on the tracks in that area
- connections to scenery control elements, allowing for the PC to control things like lighting or scenery animation items
Using this information, together with appropriate hardware interfaces to the layout, then gives you the ability to have the PC fully control the layout if you want.
Another inexpensive software package is also available, called RocRail, which can also be used for similar activities to JMRI. You might find that one package is more to your preference than the other, but as both can be freely downloaded and installed, it is easy to try both out – just remember that the data files are not transferrable between the two.
Layout Automation
Like everything else, computers can be integrated into model railway layouts to make operation easier, or even to fully control the entire layout completely automatically.
Automatic operation of trains and layouts usually requires a DCC system, and special software running on the computer that can interface with the DCC Command Station in order to get the right information sent to the DCC decoders at the right time.
Software is available for Windows, Apple, and Linux operating systems, as well as systems like the Raspberry Pi. Some is Open-Source and hence totally free, while others can cost hundreds of dollars. It just depends on what you want to achieve, and how much effort you want to invest to achieve your goals. Two of them are mentioned here.
DCC-EX Inbuilt Automation – EX-RAIL
DCC-EX has an inbuilt automation system, referred to as EX-RAIL. From the DCC-EX web site:
EX‑RAIL is an “EXtended Railroad Automation Instruction Language” that can easily be used to describe sequential command ‘sequences’ to automatically take place on your model layout. These sequences are defined programmatically in a simple command script file, and uploaded to the Command Station once to configure it. EX-Rail will then run automatically on EX-CommandStation startup or if trigger manually or on occurrence of the specified events.
From the DCC-EX web site: https://dcc-ex.com/ex-rail/index.html#gsc.tab=0
EX-Rail uses simple commands that are written as plain text to perform sequences of actions, either in timed loops, or as a result of some form of trigger (e.g. a train passing a detector). These sequences can then be used to control outputs from DCC-EX to turn on lights, or change a set of points, or play sounds, or control a locomotive, or many other actions.
If you are interested in this concept, please have a look at the DCC-EX website, and in particular the EX-RAIL information pages (https://dcc-ex.com/ex-rail/index.html#gsc.tab=0)
JMRI
If you are running JMRI on a PC, or a Raspberry PI, then JMRI has several methods of automating a layout.
Some of the available options are:
- Logix / LogixNG: An inbuilt macro system, where JMRI is instructed to take actions based on events that occur
- Jython scripts: Jython is a derivative of the Python programming language that runs under Java, and you are able to write your own scripts using this language to perform anything you want on your layout
- DispatcherPro: Provides functions and organizes information relating to dispatching trains on a model railroad layout, allowing for automated running.
- Example Scripts: JMRI also ships with lots of example scripts to help you get started, some of these can provide basic automation, from a single train that runs back and forward between 2 defined points, through to the very capable “YAAT” script (Yet Another Auto Train) script system.
For further information, please see the JMRI website: https://www.jmri.org/
Operating Sessions
More common for large home layouts than for clubs. Such layouts have multiple stations with sidings, multiple trains, multiple operators and a system (most commonly a ‘card system’) to perform realistic train running over a set period of time, usually two hours. Such sessions generally use a ‘fast clock’.
The distances on our layouts are never as far as on a 1:1 railroad, and to simulate realistic timetable operations, we need time to be scaled down to match our trains, hence the ‘fast clock’, which might run at 4:1 (where 15 minutes of real time is 1 hour of simulated time) or any other value as appropriate for the particular layout.
Further Information
If you would like further details about any of the information on this page, please use our Contact Us page, or come along to one of our monthly meetings shown on our Events page and have a chat with us.
Suggestions for other topics
If there are other topics that you would like to see explained here, please use our Contact Us page and ask us to incorporate your request.